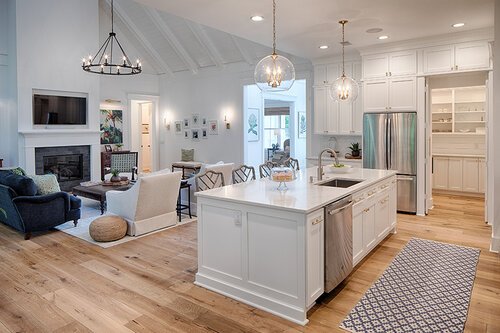
How To Paint Kitchen Cabinets
One of the most economical and environmentally friendly ways of remodeling a kitchen is to paint your existing cabinets. And it makes such a high impact in changing or updating the look and feel of your home. You don't have to have an expensive designer kitchen to be in a bright space that you love!
You can achieve professional looking results yourself if you take the time to do it right.

Here's how:
1. Before you begin taking apart your cabinet doors, remove everything else on the kitchen counters and anything else that might get in your way. You'll need the space and save things from getting ruined with paint drips.
2. You might want to tape down drop cloths or cardboard on the floor at the base of the cabinets so that none of the paint drips on the floor.
3. Set up a space on the floor of a garage or a big room where you can lay your kitchen doors flat. Have a drop cloth, paper, or better yet, pieces of wood that you can lay them on.
4. Take your doors and hinges off one at a time, numbering each door and corresponding cabinet as you go and putting its hinges into a baggie and numbering it as well.
5. Wash the cabinet doors and the frames with a mild detergent.
6. Tape off the insides of the cabinet frames (unless you're painting the full inside box as well).
7. Fill in any holes or chips with a wood filler.
8. Degloss or sand the doors. Degloss them by using a deglosser you can find at any hardware store. This will allow you not to have to sand your cabinets by hand. If you choose to sand, then use a degreaser first to make sure all the grease from cooking is completely gone, then use a 150 grit sandpaper and makes sure to wipe up off all the dust.
9. Now it's time to paint. You'll want to prime first, as primer forms a better bond with the surface than paint alone would (if your cabinets are already painted and you are re-painting them the same color, it is OK to skip this step and go ahead and apply the paint). I use no-VOC latex paint but some people prefer an oil-based or chalk paint or fusion paint - it's really your own preference. When you purchase it, chat up the paint desk person to be sure you're getting a good bonding primer that works for either melamine or wood (depending on which type of cabinet you have), and a paint specifically for cabinets with an enamel finish so that it will hold up and not chip.
10. There are a couple of ways to apply the paint. A sprayer is the best way to get a smooth and glossy finish - just do this on the doors, not the frames. You can rent these at hardware stores or rental agencies. But if you'd rather not, you can still get a great finish by using a high-quality paint brush - 2 1/2" to 3" would be ideal. Some people find that a good foam roller is best, but I prefer a brush. Just remember that you're painting in very thin coats so you won't get any brush or drip marks. It may be tempting to try to coat the paint on as thick as possible just so you can be finished, but DON'T. The best and most durable paint jobs are built up by consecutive thin layers of paint.
11. Paint, sand, and repeat. Start with your primer, then coats of your paint colour. In between coats, take some 320 grit sandpaper and very lightly sand the flat surfaces again so that you have the smoothest possible surface for your next coat. Use a tack cloth to wipe away all the dust, and go on to your next coat. You will likely need 2-4 coats - depends on how picky you are and the look you're going for.
12. Always finish off with a water-based polyurethane top coat in a satin or matte finish. This will help seal the finish and keep from chipping.
13. Let dry 24 hours and then hang the doors again.
14. Install any new hardware you purchased for a totally new look.


(Click on photos for sources)
For more ways to make your kitchen refresh sustainable, check out:

SUBSCRIBE & RECEIVE THE COLOUR WORKBOOK:
HOW TO CREATE A NATURALLY SERENE HOME WITH COLOUR.